Showing posts with label PTU tutorial. Show all posts

Sunday, January 10, 2010

Tutorial - New Year 2010


Happy New Year 2010 Tutorial

Program Used - Paintshop Pro 10

Plugins Used - EyeCandy 5 Impact (not required!)

Scrap Kit - Elegant New Year PTU tagger sized kit by C.C.Creationz @ http://cccreationz.blogspot.com
Available for purchase at Scrappin Dollars @ http://scrappindollars.com

Template - HNY2010template by Kelly's Kreations @ http://kellyskreationcorner.blogspot.com

Tube - glitter2010 by Geith Garvey @ http://garvgraphx.com for purchase @ http://www.mypsptubes.com

Font - Zoe - http://azfonts.com

Supplies - glittersilver.png click below to download png file.
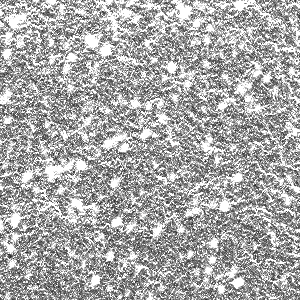


Open HNY2010 template. Copy. Close original. Delete top layer of template (it's the credits/watermark).

In your scrap kit, open paper11. Minimize it.

Select your color replacer tool. Background properties black.  Foreground properties paper11.

Use the color replacer tool on happynewyearblack, black rectangle, and blackcircle layers.

Open glittersilver file (that you downloaded from my blog).  Minimize.

Select your color replacer tool. Make sure the tolerence is set to 200. Background properties b7b7b7 (gray). Foreground properties glittersilver.

Use color replacer tool on 2010glitter, smglittercircle, happynewyearglitter, glitterrectangle, glitterstrips, and glittercircle layers.

Open your tube of choice. Copy. Close orginal. (I chose a tube that has an up close headshot and a full body shot!)

Go to template. Select silverhalfcircle layer. Paste headshot of tube of choice as new layer.

Click silverhalfcirclelayer. Select all. Float. Defloat. Invert. Click layer with headshot of tube. Delete. (Tube should be only inside half circle now)

Selections > None

Set opacity of layer with headshot of tube to 40 or to your liking.

Go back to other image with full body shot of tube of choice. Copy. Go to template. Paste as new layer.

Arrange to your liking.

Select big2010 layer.

Select color replacer tool. Background properties paper11. Foreground properties 808080 (darker gray).

Use color replacer on big2010 layer.

In the scrap kit open stars2. Resize to your liking. Copy. Go to template. Click bkg layer.

Paste stars2 as new layer. Arrange to your liking.

Open bow2. Resize 60% and copy. Go to template and select happynewyearblack layer.

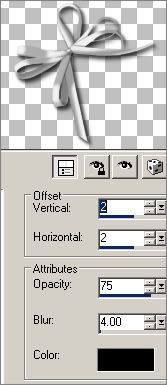
Paste bow2 as new layer. Add drop shadow with the following settings.


Open silver embellishment. Resize by 80%. Copy. Go to template and click layer with body shot of tube of choice.

Paste silver embellishment as new layer. Move to lower left. Duplicate. Mirror.

Open sparkles. Resize 75%. Copy. Go to template and select mask layer. Paste sparkles as new layer.

Select rose with feather and pearls. Resize 50%. Copy. Go to template an click layer with your silver embellishment.

Paste rose with feather and pearls as new layer. Arrange to your liking.

Select pearls. Resize 30%. Copy. Go to template. Paste as new layer. Move to lower left. Duplicate. Mirror.

Add your copyright info and watermark.

Merge all.

Add your name.

I used "Zoe" font.  Foreground settings black. Background settings glittersilver. 1.0 stroke width. Size 72.

I also increased the size of my name more by hand. Then I converted to raster layer.

Effects > Plugins > Eye Candy 5 Impact > Gradient Glow - Using the following settings
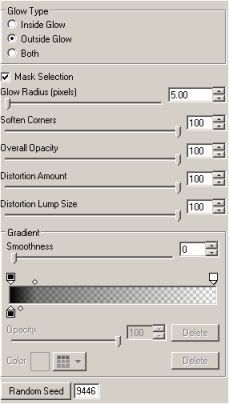


Repeat the gradient glow with the same settings 2 more times.

As usual you can click on the graphics for a larger view!  :o)


Miranda

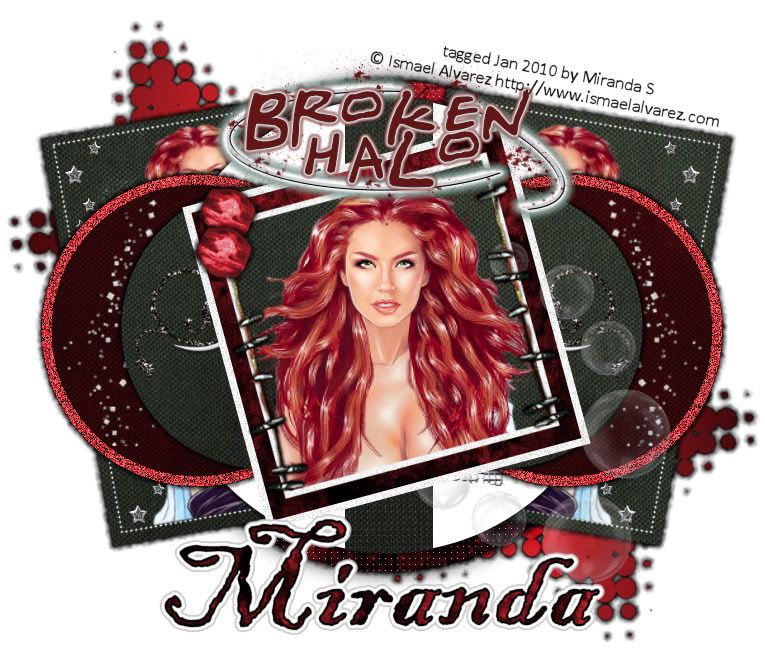
Tutorial - Broken Halo - Redhead


 I wrote this tutorial on January 10th 2010 for deceptions82.blogspot.com
Any resemblance to any other tutorial is purely coincidental.

Supplies Needed
I used Paintshop Pro, version 10.
I also used Alien Skin Eye Candy 5 – Impact.
A working knowledge of PSP is also needed.

Scrapkit. I used “Broken Halo” by Angels Designz.
You can purchase the kit -http://angelsdesignz.blogspot.com

Tube of Choice. I used a FTU tube from Ismael Alvarez. His artwork can be found at http://www.ismaelalvarez.com

Template. I used Missy_Rachel_Collab_Temp8. You can find this template and others on the blog - http://scrapsofenchantment.blogspot.com

Font. I used Blackadder ITC Font. It should come standard with your fonts. Otherwise you can check http://www.azfonts.com

Open your template.

Save a copy of your template.

Delete the top layer (the credits/watermark/etc)

From your scrap kit open your paper3, paper7, and paper8 and minimize them all within your PSP.

Select the framebackground2 layer.

Select the color replacer tool. Have the background set to black and the foreground set to paper7 in your materials window.

Replace the color of framebackground2 so that it's now the paper7.

Repeat these steps on the circle5, circle4, rectangle2, and rectangle1 layers.

Select the heartbrush layer.

Select the color replacer tool. Have the background set to f82c87 (hot pink) and the foreground set to paper8 in your materials window.

Replace the color of heartbrush so that it's now the paper8.

Repeat these steps on the circle 3 and circle 2 layers.

Select the starleft layer.

Select the change to target tool.  Have hte background set to f82c87 (hot pink) and the foreground set to paper3 in your materials window.

Change the color of the star so that it is light red (instead of hot pink).  You my have to repeat this step a few times to achieve the right shade of red.

Repeat this step on the starright, circle3, and circle 2 layers.

Having only the starright & starleft layers visible, merge them.

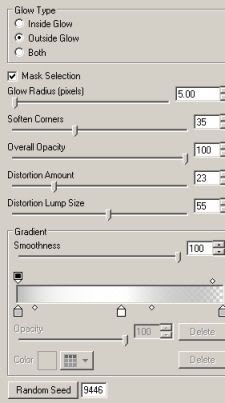
Effects > Plugin > Alien Skin Eye Candy 5 - Impact > Gradient Glow


See my picture for the settings to use for the black subtle edges.

Apply this to your layer of both the stars merged.

Having only the dottedsquareright & rectangle2 visible, merge them.

Repeat the steps above to add black subtle edges.

Having only the dottedsquareleft & rectangle1 visible, merge them.

Repeat the steps above to add black subtle edges.

Having only the largecircle & blurcircle visible, merge them.

Repeat the steps above to add black subtle edges.

Select your circle 1 and repeat the steps above to add black subtle edges.

Repeat the steps for circle2, circle3, circle4, and circle5 to add black subtle edges as well.

Open your tube of choice.  Save a copy of your tube of choice and close the original.

Copy/Paste your tube of choice so it appears inside of the frame on the frame2 layer.

Increase the size so that just the face appears. Use the eraser tool to remove any pieces that appear outside the frame.

Copy/Paste your tube of choice again, resize it so that it fits within your desired location on the left side of the template.

Duplicate the layer with your smaller tube of choice.  Mirror your duplicated layer.  Now it should appear on the right side as well.

Going back to your scrap kit, choose any embellishments you would like to add to your tag.

I chose to add bead 1.

I also chose to add binding, and resized it.  And I arranged it over the frame2 layer.

Then I used the starstring and I resized it smaller and arranged it on the left side of the template, then duplicated it and mirrored it so that it also appears on the right side.

Next I used the globe and resized it quite a bit. I duplicated it 3 times and arranged the 3 globes. Then I resized the third globe smaller and duplicated this 4 times and arranged the globes.

Then I resized the 5th globe smaller and arranged it.

After that I added swirl. I arranged it on the left side above the circle layers. Then I duplicated this layer and mirrored it so there is a swirl on the right side as well.

Next I used glitterspill and resized by 50% and arranged it on the left side. Then I duplicated this layer and mirrored it so there is a glitterspill on the right side also.

Then I merged everything visible (except the white background).

Now you can add your watermark and your name!

Miranda

Monday, November 23, 2009

Tutorial - Santa is Coming - Girl


I wrote this tutorial on November 23rd 2009 for deceptions82.blogspot.com
Any resemblance to any other tutorial is purely coincidental.

Scrap kit - Christmas Traditions PTU Kit by C.C.Creationz @ http://cccreationz.blogspot.com
Available for purchase *HERE* or *HERE*

Template (MV_Template11) by MelissaVgraphics @ http://melissav-psp.blogspot.com

Font - Jessaine Script SSK - Download Here

Tube - Christmas Star by Chatzoudis PTU @ http://www.mypsptubes.com

Open MV_Template 11

Save copy as - wherever you save your work as you're working on tags...

Delete credits layer

Open Paper 7. Copy.

Select "Frame" Layer.

Select All.  Float.  Defloat.  Paste into Selection. Select None.

Open Paper 17. Copy.

Select "Center Rectangle" Layer.

Select All. Float. Defloat. Paste into Selection. Select None.

Select "Frame" Layer.

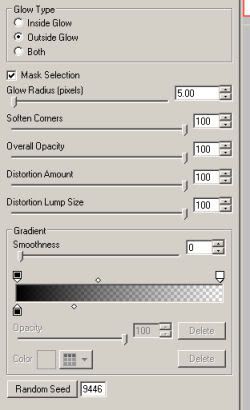
Effects. Plugins. Alien Skin Eye Candy 5 - Impact. Gradient Glow.

Settings Pictured Below.


If you do not have Eye Candy 5 - Impact you can substitute with your 3D Effects Drop Shadow Setting.
Set Blur to 0, Opacity to 100, Vertical and Horizontal to 4.
Then Redo with the same settings except change Vertical and Horizonal to -4 this time.

Open White Ornament. Copy. Paste as New Image. Close Original.

Resize by 20%. Copy. Paste into Template above "Circles" Layer. Place in desired location.

Go back to your Copy of White Ornament. Resize by 50%. Copy. Paste into Template. Duplicate. Arrange both in desired location.

Open Green Ornament. Copy. Paste as New Image. Close Original.

Resize by 16%. Copy. Paste into your Template. Duplicate. Arrange both in desired location.

Go back to your Copy of Green Ornament. Resize by 40%. Copy. Paste into Template. Duplicate 2 times. Arrange all 3 into desired location.

Open Red Ornament. Copy. Paste as New Image. Close Original.

Resize by 14%. Copy. Paste into your Template. Duplicate. Arrange both in desired location.

Go back to your Copy of Red Ornament. Resize by 70%. Copy. Paste into Template. Arrange in desired location.

Go back to your Copy of Red Ornament. Resize by 50%. Copy. Paste into Template. Duplicate 2 times. Arrange all 3 into desired location.

Select the "Circles" Layer. Delete it.

Make all the layers except for the ones with ornaments on them, invisible (so you cannot see them).

Go to one of the layers with ornaments on them and "merge visible".

Select the layer with your ornaments and add a drop shadow. I used the settings of Vertical and Horizontal at 2. Opacity at 50. Blur at 5. And the color black.

Open Paper 9.

Select the "strip 1" layer. Select all. Float. Defloat.

Using Flood Fill Tool. Choose Paper 9 as your Foreground and Stroke Properties Pattern at a scale of 50%. Fill in the Selection. Select None.

Open Paper 19.

Select the "strip 2" layer. Select all. Float. Defloat.

Using Flood Fill Tool. Choose Paper 19 as your Foreground and Stroke Properties Pattern with same settings as before. Fill in Selection. Select None.

Open Paper 4.

Select the "strip 3" layer. Select all. Float. Defloat.

Using Flood Fill. Choose Paper 4 as your Foreground and Stroke Properties Pattern with same settings as before. Fill in Selection. Select None.

Select "strip 1" Layer.

Effects. Plugins. Alien Skin Eye Candy 5 - Impact. Gradient Glow.

Same settings as before.

Repeat for "strip 2" layer and "strip 3" layer.

Again if you don't have Eye Candy 5 Impact you can substitute with the drop shadow, using the same settings as before.

Open Garland. Copy. Paste as New Image. Close Original.

Resize Garland by 50%. Copy. Paste into Template. Duplicate 3 times.

Place one Garland along the left side of the inside of the frame. Place one Garland along the right side of the inside of the frame.

Rotate the remaining Garland so it's laying horizontal. Duplicate.

Place one of these Garland along the top inside of the frame. Place the other Garland along the bottom inside of the frame.

Make all the layers except for the ones with garland on them, invisible (so you cannot see them).

Go to one of the layers with garland on them and "merge visible".

Select the layer with your garland and add a drop shadow. I used the settings of Vertical and Horizontal at 2. Opacity at 50. Blur at 5. And the color black.

Open your tube of choice.  Copy. Paste into Template below the garland layers. Increase so the tube of choice fills half of the frame. Change opacity of this layer to about 55.

Go back to your tube of choice. Copy. Paste into Template above all the layers. Arrange tube in desired location.

Add credits & copyright information as needed. Merge layers.

Add your name.  I used Jessamine Script SSK font. Paper17 for the Foreground and Stroke Properties. White for the Background and Fill Properties.

Arrange to your liking.  Export as jpg.  Enjoy :o)

Miranda

Sunday, November 8, 2009

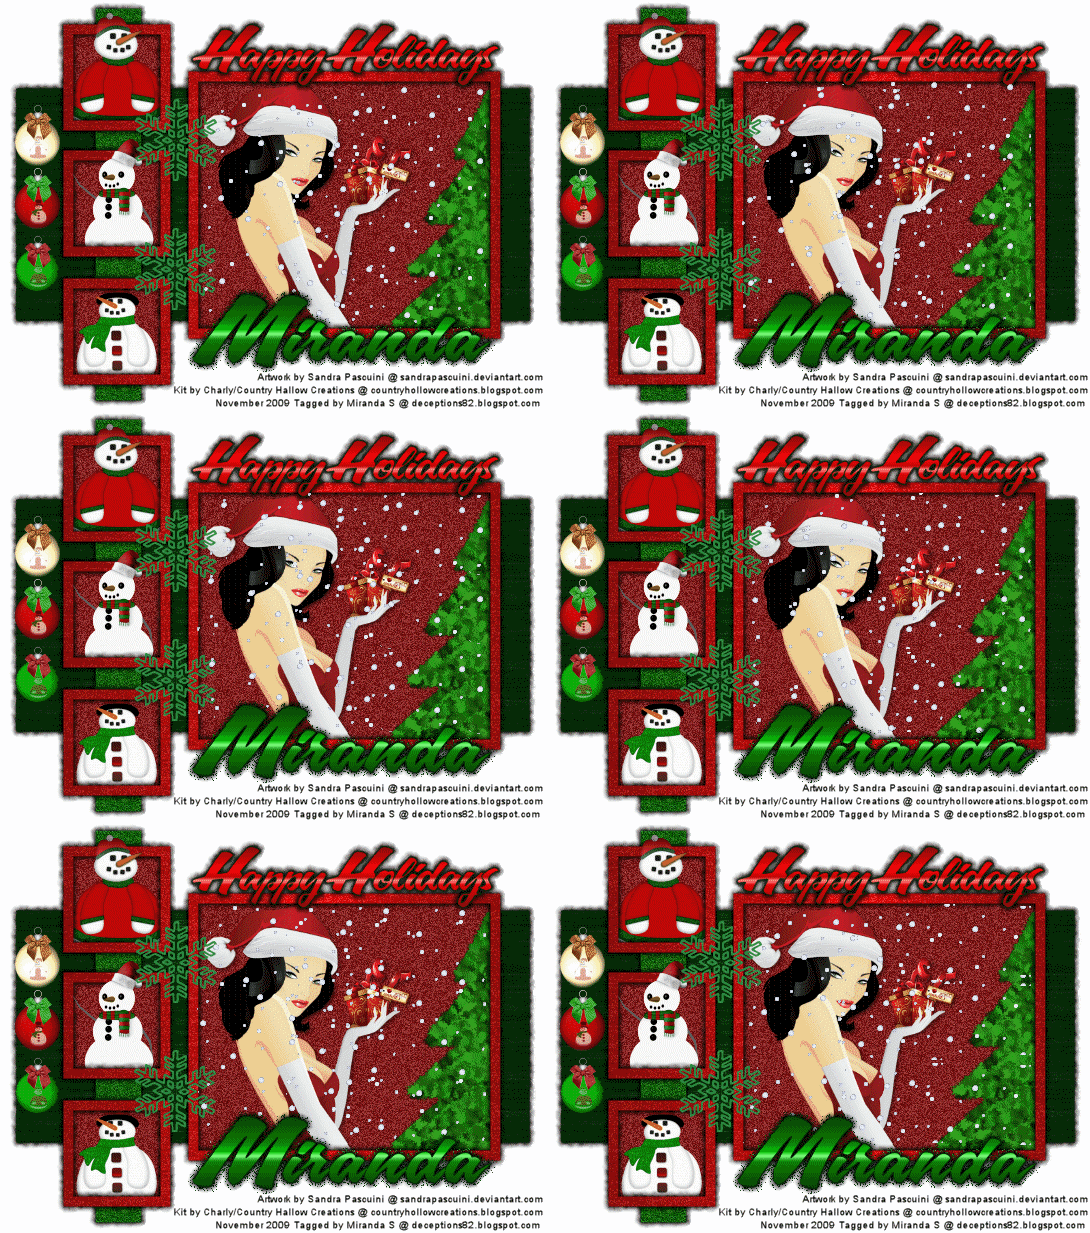
Tutorial - Animated - Happy Holidays


I wrote this tutorial on November 8th 2009 for deceptions82.blogspot.com
Any resemblance to any other tutorial is purely coincidental.

Supplies Needed
I used Paintshop Pro, version 10.
I also used Alien Skin Eye Candy 5 – Impact.
And for animating I used Animation Shop 3.
A working knowledge of PSP is also needed.

Scrapkit. I used “Snow Family” by Country Hollow Creations.
You can purchase the tagger size kit - http://www.countryhollowscraps.com

Tube of Choice. I used a lovely tube called “Merry Christmas” from the artwork of Sandra Pascuini. Her artwork can be found - http://sandrapascuini.deviantart.com

Template. I used #36 by Yvette at Essence of Creativity. You can find this template and others on her blog - http://essenceofcreativity1.blogspot.com

Font. I used A&S Blaze Font. You can find it more fonts - http://www.azfonts.net
Get comfy in your chair &let's get to tagging :)

Open your template.

Save a copy of your template.

Delete the top layer.

From your Scrapkit open red foil paper.

In your template click on large frame layer.

Using your magic wand go to select all, float, and then de-float. Paste your red foil paper into the selection & then select none.

Now click on the small frames layer.

Using your magic wand go to select all, float, and then de-float. Paste your red foil paper into the selection &; then select none.

From your Scrapkit open green foil paper.

In your template click on large rectangle layer.

Using your magic wand go to select all, float, and then de-float. Paste your green foil paper into the selection & then select none.

From your Scrapkit open green glitter paper.

In your template click on thin rectangle layer.

Using your magic wand go to select all, float, and then de-float. Paste your green glitter paper into the selection & then select none.

Now may be a good time to save your work!

From your Scrapkit open red glitter paper.

In your template click on small squares layer.

Using your magic wand go to select all, float, and then de-float. Paste your red glitter paper into the selection & then select none.

Now click on the large square layer.

Using your magic wand go to select all, float, and then de-float. Paste your red glitter paper into the selection & then select none.

From your Scrapkit open 3 tubes of your choosing. I chose snowboy, snowbaby, and snowfamily for mine.

You'll need to resize each of these tubes by 20%

In your template click on small squares layer.

Paste as new layer each of your 3 tubes chosen from the Scrapkit. Arrange them to your liking.

If any part of the snowmen (or your tubes chosen from the Scrapkit) show around the outside of the smaller frames you'll need to use your erase tool and erase this portion. I used the square shape & made sure it was 100 hardness & 100 opacity.

From your Scrapkit open 3 Christmas Bulbs of your choosing. I chose bulb 1, 2, & 3 for mine.

You'll need to resize bulb 1 by 12% and bulbs 2 & 3 by 16% in order to make them all the same size.

In your template click on circles layer.

Paste as new layer each of your 3 bulbs chosen from the Scrapkit. Arrange them to your liking.

Open your tube of choice.

In your template click on large square.

Paste your tube of choice & resize & arrange to your liking.  I also added a drop shadow to my tube of choice with the settings of; vertical 2, horizontal 2, opacity 50, blur 5, and color of black.  Then I used my erase tool and removed any parts of the tube that were showing outside of the large frame.

Add any extra tubes from the Scrapkit if you choose. I choose to add 2 copies of snowflake 2 (resizing it by 20%) and positioning it in between the large frame & small frames. I also chose to add the tree (resizing it 15%) and pasting it inside of the large frame. Then erasing any portion that shows outside of the frame.
If you have Alien Skin Eye Candy 5 – Impact you can add a gradient glow to your large rectangle, thin rectangle, small frames, and large frame layers. My settings are pictured below.

If you do not have this plug-in, you can simply add drop shadow to these layers if you would like. Select the layer you want to add the shadow to. Go to Effects, 3D Effects, Drop Shadow.

In your template click on the top layer.

Using your text tool click anywhere on that layer to add your text.

Choose A&S Blaze as your font. Size 48. Bold. Alignment Center. Stroke Width 1.5. Create as Vector selected. Tracking set to -0.050. Foreground/Stroke properties set to a dark green color. Background/Fill properties set to gradient of multi-red, linear style, 0 angle, 0 repeats, Invert is unchecked. Type “Happy Holidays” in your Text Entry Box. Click Apply.

Position your “Happy Holidays” text wherever you'd like. I positioned mine centered above the large frame.
Select the Layer your Text is on. It should be called Vector. And right click and convert it to raster layer so we can add some effects!

If you have the plug-in add a gradient glow to your “Happy Holidays” text using the same settings as before.
If you do not have this plug-in, you can simply add drop shadow to this text, as you did with your previous layers.

Using your text tool click to add your watermark & any copyright information needed.

Now you can merge all (flatten) before we add our name!

Using your text tool click anywhere to add your name.

I chose A&S Font again. Size 72. Bold. Alignment Center. Stroke Width 1.0. Create as Vector Selected. Tracking set to 0. Foreground/Stroke properties are set to dark green color. Background/Fill properties set to gradient of multi-red, linear style, 0 angle, 0 repeats, Invert is unchecked. And you type your name. Click Apply.

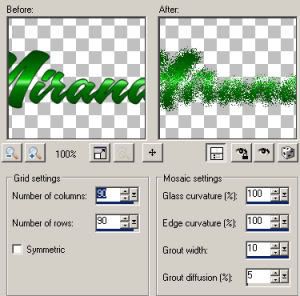
Position your name wherever you'd like. I positioned mine centered below the large frame.  To add the effects I have you can convert your text to raster, duplicate the layer, and use Texture Effects, Mosaic Glass with the settings below.

Then on the top layer of my text I used the same gradient glow we used before.

If you do not want to animate – Merge all (flatten) and export as JPG image. And show off your completed tag! Feel free to let me know if you've used my tutorial and if you have any questions/complaints/suggestions!
If you want to animate using Animation Shop 3. Mark your Merged Layer as Invisible & then Merge visible. But do not flatten. Make your invisible layer visible, and make the layer with your name on it invisible. Also make the white background layer visible.

Go to edit, copy merged.

Open Animation Shop 3.

Paste as New Animation. Duplicate this so there are 20 frames.

Open the snow animation which you can download *here*

Right click frame one of your snow animation. Hold shift down and right click frame 20 so that all the frames are highlighted blue.  Now CTRL-C or copy.

Click back to your animation 1 (your blank tag)

Right click frame one of your tag. Hold shift down and right click frame 20 so that all the frames are highlighted blue.

Click Edit, Paste into Selected Frame. And position your snow so that it appears to be inside the large frame.

You will repeat this step several times until the frame looks like it is full of the snow animation.

To preview your work click view & select preview.

You may want to save this animation.  And feel free to close the snow animation.

Go back to Paintshop Pro and make the text with your name on it visible again.

Select Edit. Copy. Go back to Animation Shop 3.

Paste as New Animation. Duplicate this so there are 20 frames.

Right click frame one of your name. Hold shift down and right click frame 20 so that all the frames are highlighted blue.

Click back to your animation 1 (your newly saved tag with snow). And make sure that all frames are selected.
Click Edit, Paste into Selected Frame. And position your name wherever you think it looks best.

Preview your animation like we did before to make sure it looks okay.

Then save as, and enjoy your new animated tag!


Miranda